Note: This is the write-up of a talk I gave recently at the PyGRAZ user group.
During one of our planning meetings for Meet The Meetups 2016 I suggested we should have a simple website where we could collect all relevant information about the event for (potential) attendees. Lektor had been on my radar for quite a while but I never found a place where it might fit; well, until that meeting happened 😉

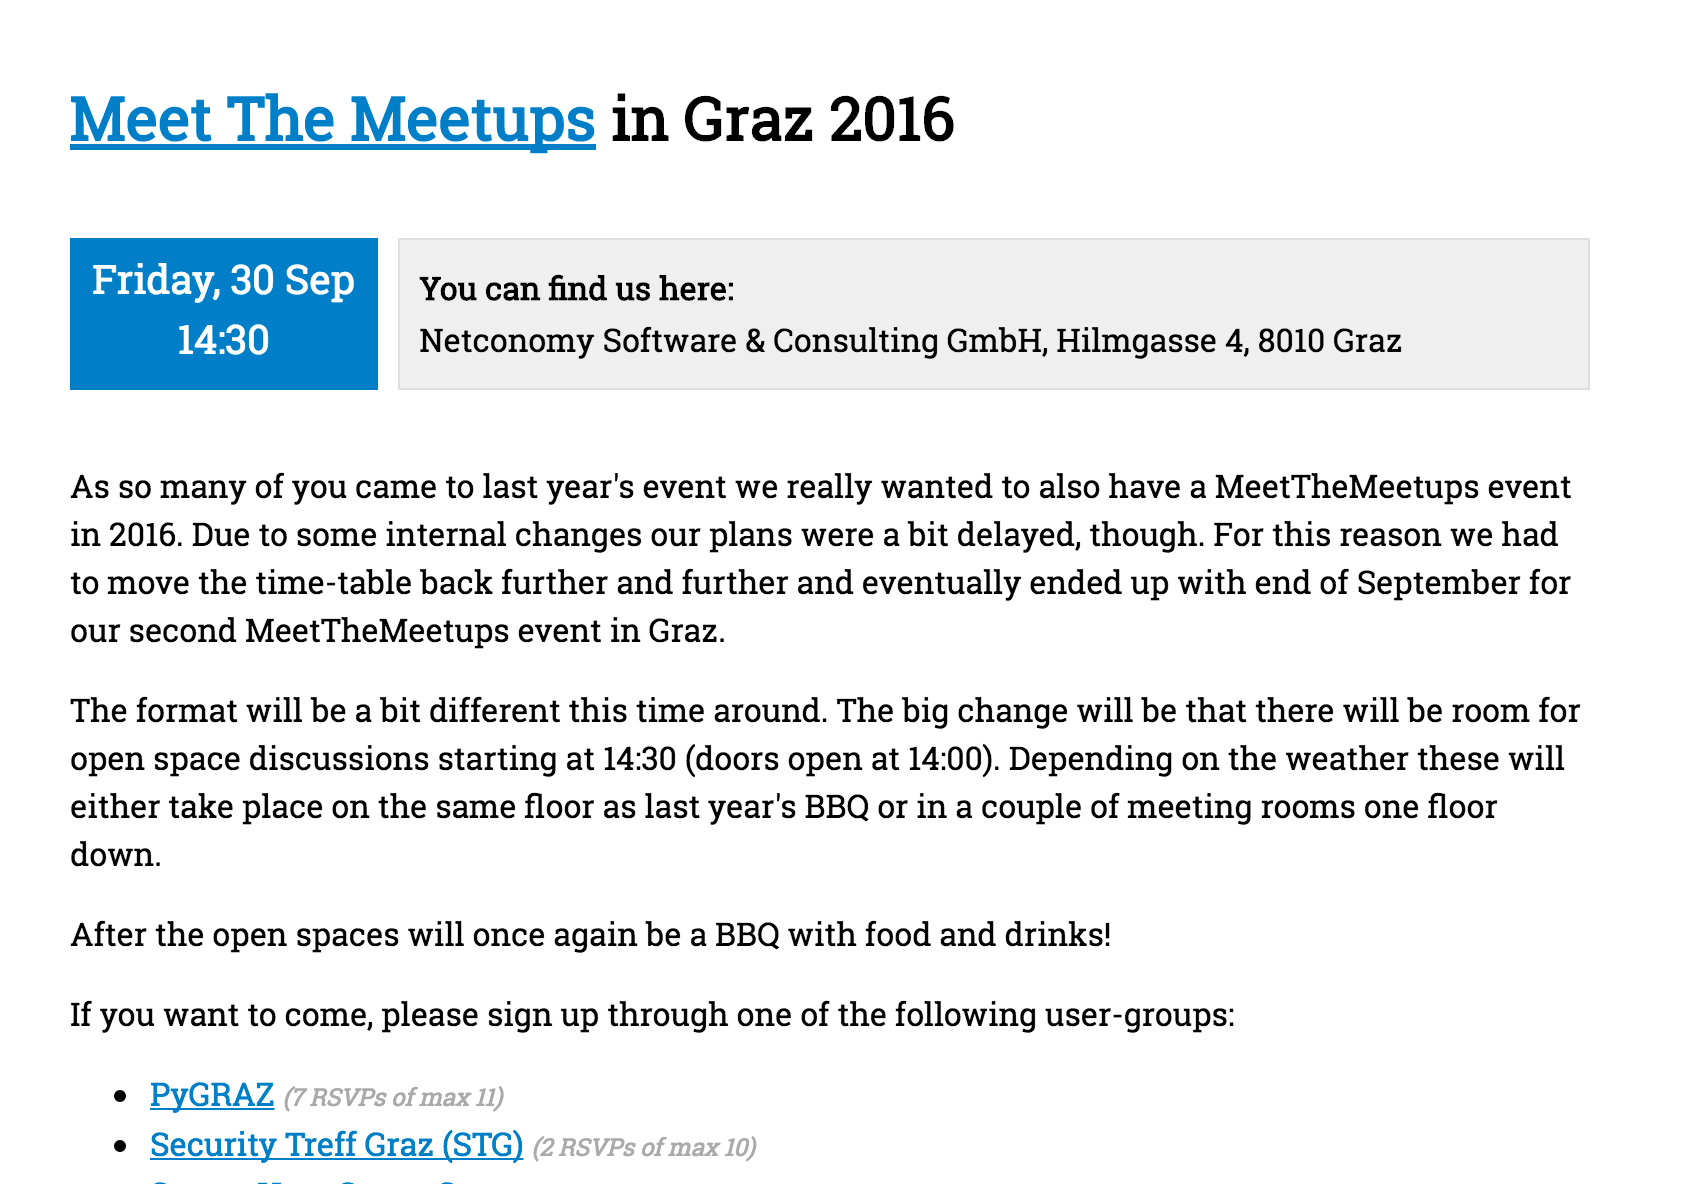
For Meet The Meetups 2016 we wanted a way to display all related information on one page.
So what is Lektor? Lektor is a static site generator. You give it a handful of folders and files that represent the raw content and it will produce all the necessary static HTML files for it to become a website. Hugo (which I use for zerokspot.com et al.) and Pelican are other examples but while they are mostly focused on blogs, Lektor is more like an actual site-builder. Still, all three don’t use a relational database or something like that to store the data but keep everything in simple text files that you can (for instance) version-control with Git.
The folder structure is pretty simple: What looks like a folder in the URL is a
folder in the file-system. You can override aspects of that but that’s the
default. https://meet-the-meetups.org/events/graz-2016/ is basically a
contents.lr file inside the content/events/graz-2016 folder.
$ tree content
content
├── contents.lr
└── events
    ├── contents.lr
    ├── graz-2015
    │   └── contents.lr
    └── graz-2016
        └── contents.lr

3 directories, 4 files
Alongside that you have a config file, a folder for your Jinja templates
(templates), and folders for your data definitions (more on that later).
Other systems handle this most often in a similar way, but while they are more focused on blogs, we wanted something where we could display events and lots of meta data around them. Nothing of this is impossible with the other generator, but with Lektor it was just a lot easier and far more structured. Lektor also offers a simple admin interface as well as a couple of entry-points for a nice plugin system.
Modeling your data
Let’s start with the structure. Lektor handles your content structure explicitly
by letting your create data models before the actual data. You do that by
creating simple INI files that describe what you will eventually put onto your
pages and the contents.lr files where their data is stored. Let’s continue
with the MTM example. An event has a handful of properties:
- title
- start time
- location
- description
- contacts for people who have questions
- groups that help organise the event
Out of this information we created this models/event.ini file:
[model]
name = Event
label = {{ this.title }}

[fields.title]
label = Title
type = string

[fields.body]
label = Body
type = markdown

[fields.after_action_report]
label = After action report
type = markdown

[fields.start]
label = Start
type = datetime

[fields.location]
label = location
type = markdown

[fields.groups]
label = Groups
type = flow

[fields.contacts]
label = Contacts
type = flow
Labels are simply used to give the field a nice label (…) in the admin interface (more on that later) and the type is mostly self-explanatory. But what is that “flow” type?
Think of it as a placeholder for a list of complex elements, like models inside
your models. Let’s go with the groups field here. On the event page we want to
list all the groups that offer signup-forms for the event. With each group we
display at least its name and a URL (as well as some additional fields related
to the RSVP process). Each so-called “flow block” takes its definition from a
file in the flowblocks folder. So in our case we created a
flowblocks/group.ini file:
[block]
name = Group
button_label = Group

[fields.name]
label = Name
type = string

[fields.url]
label = URL
type = url

[fields.rsvps_yes]
label = RSVPS
type = integer

[fields.rsvps_limit]
label = RSVP limit
type = integer

[fields.notes]
label = Notes
type = markdown
That’s pretty much all there is to it. Now we have our data modelled, but how do we actually create data?
The admin interface
This is where the admin interface comes in. Right after you’ve created yor
Lektor site, you can start a local development server with $ lektor server.
When you now visit http://localhost:5000 you will see the start page
and a small pencil icon in the upper right corner. That’s your entry to the
admin interface where you can add new pages (which use the model):

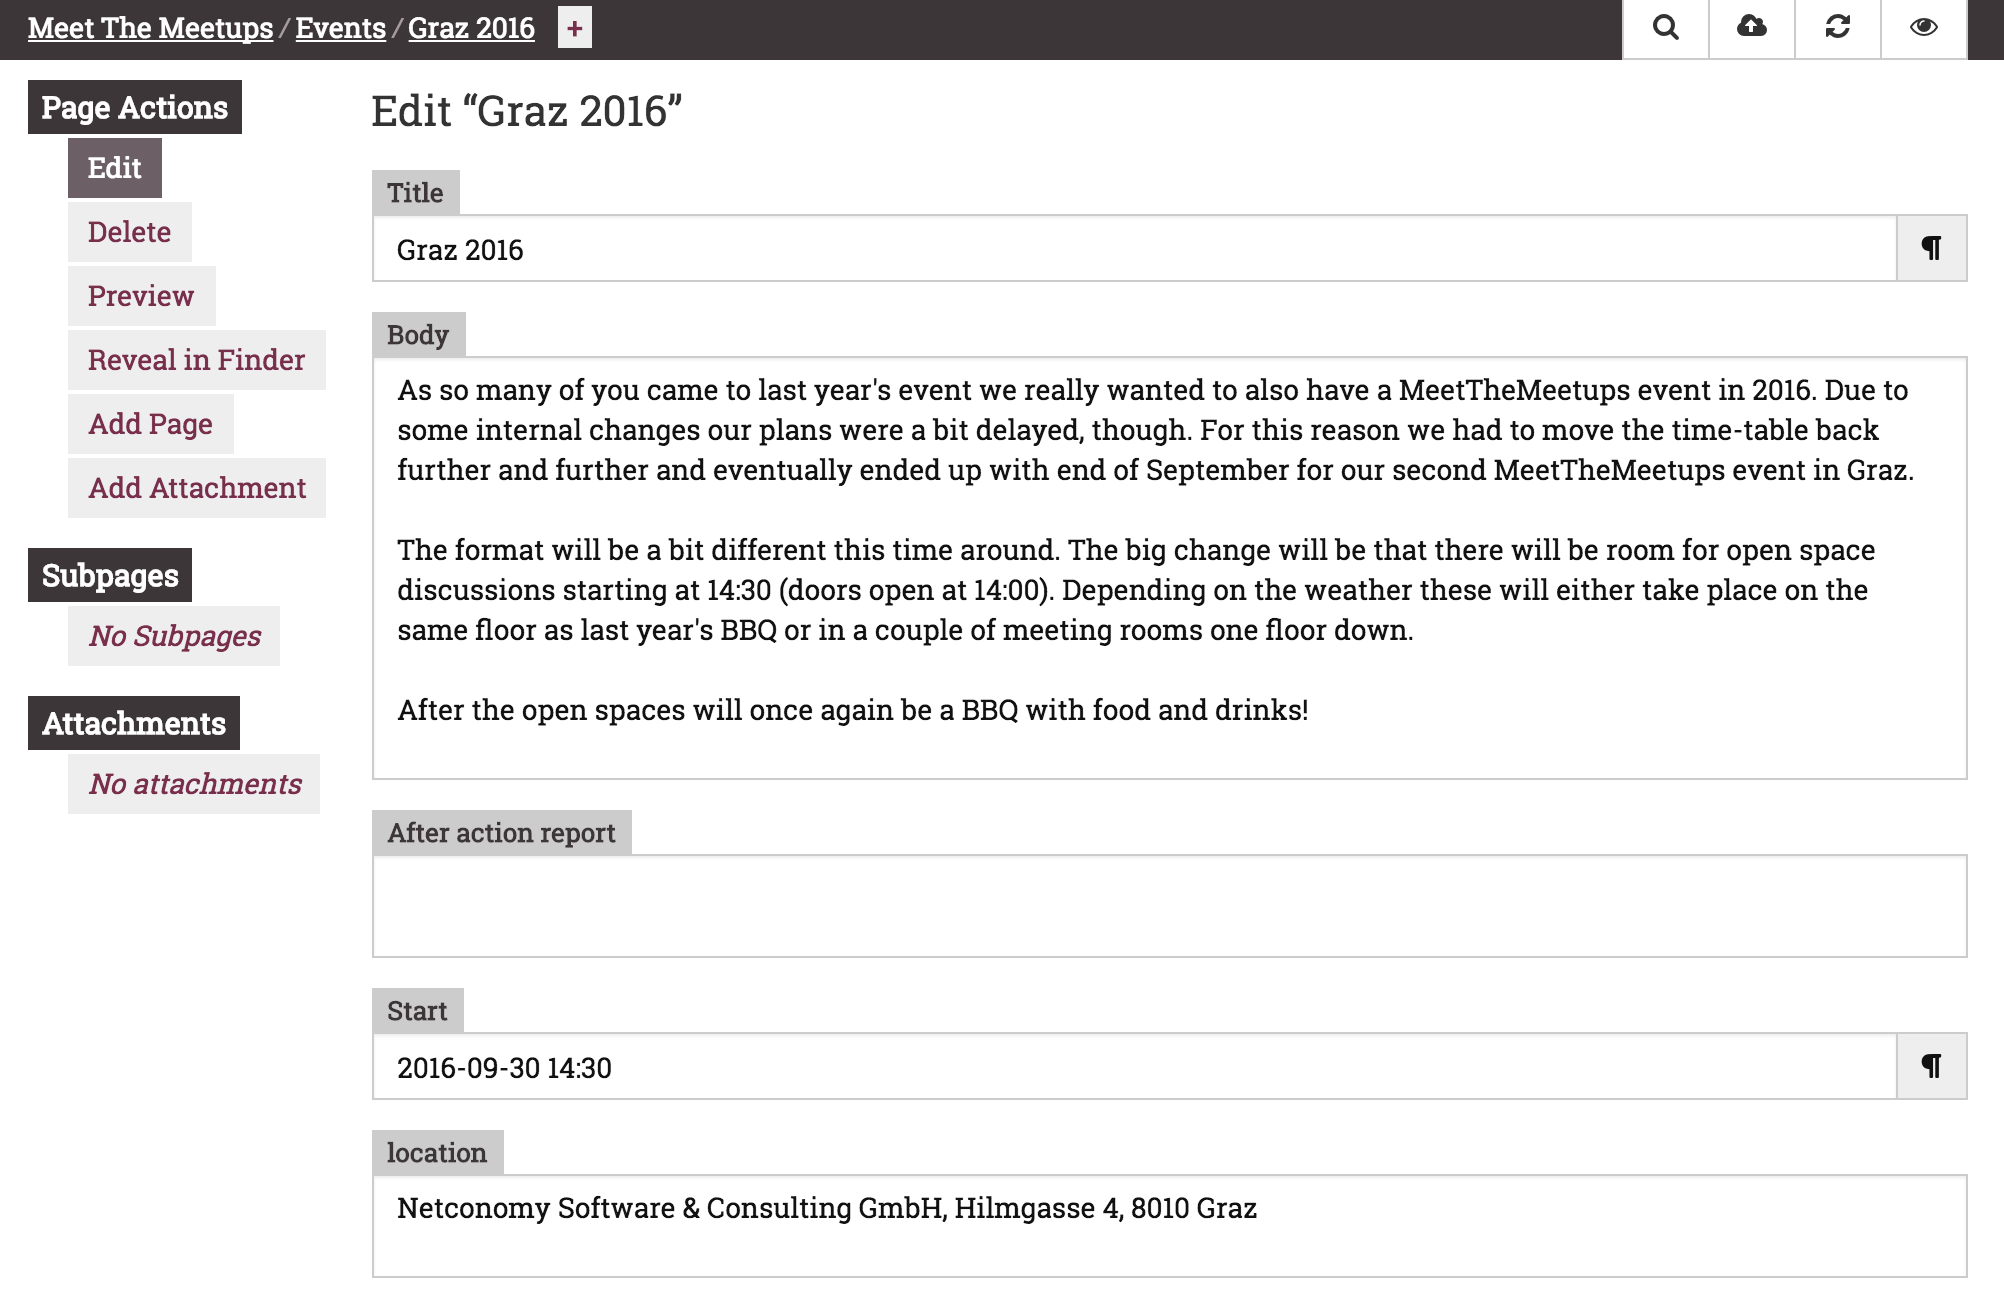
This would be the admin interface for the 2016 event page.
Here you can add new subpages (on the left side) and edit the value of every
field. You can also manage attachments (basically files in the same folder as
the contents.lr file).
Right now it feels a bit bare-bone. There is no date-picker for the datetime field, only basic URL validation, restricting what flow blocks you want to have in each flow-field is not possible as far as I can tell, but it offers more than enough to get going and create content quickly and with ease!
Surely, you could create the contents.lr files manually as the data format is
quite simple, but with the admin interface it is more comfortable right now.
Dealing with external data
As mentioned above, we also wanted to display RSVP related data on the event page. That mostly comes down to asking the meetup.com API for the RSVPs on each event associated with the groups. For situations where a group isn’t on meetup.com, we can add that information manually to the group’s block.
If you already have data lying around as JSON (or INI) files, you might want to look at data bags. In our case we tried to have the data generation integrated into the whole building process. Our current (and most likely rather naive approach) is that we use Lektor’s plugin system to hook into the building process. If a page is processed that contains a group-block, we check if it’s a meetup.com URL and ask their API for information regarding the RSVPs.
Luckily, it is very easy to create a new plugin. Simply run $ lektor dev new-plugin
and you have one. The plugin system is event-oriented with Lektor
offering a couple of entry points where you can hook into certain steps of the
tools life cycles in order to change its behaviour. You can find a list of all
currently supported events in the documentation. For now, we’re using the
before-build event for our little check:
import os

from lektor.pluginsystem import Plugin
from lektor.db import Page

class MeetupIntegrationPlugin(Plugin):
    name = u'meetup-integration'
    description = u'Integrate Meetup.com data into the event pages'
    api_key = None

    # ...

    def on_setup_env(self, **extra):
        key = os.environ.get('MEETUP_API_KEY')
        if not key:
            print("No MEETUP_API_KEY found. Not importing data")
        self.api_key = key

    def on_before_build(self, source, **extra):
        if not self.api_key:
            return
        if isinstance(source, Page):
            if source['_model'] == 'event':
                start = source['start']
                if source['groups']:
                    for group in source['groups'].blocks:
                        url = unicode(group._data.get('url', ''))
                        if 'https://www.meetup.com' in url:
                            group._data['rsvps'] = self._get_reservations(url)

    # ...
Once we have the event data, we extend the actual flow block instance with the new information. This is also the part where we used a bit of private API in order to actually change property values.
It’s probably also not the best place to hook into the building process as Lektor tries to only re-compile pages that actually changed. Our API request simply doesn’t change the actual content “enough” for it to trigger a rebuild. That’s something we will probably try to improve in the future (if first having to clear a folder before rebuilding it becomes too annoying).
Extending templates
As Lektor is mostly developed by Armin Ronacher, all templates are Jinja templates. Depending on your needs you will probably start looking into ways to get custom filters etc. into the templating process. In the documentation this is actually the primary example for when to use the setup-env event-hook so I won’t repeat that snippet here 😉
So…
… far Lektor has been a great choice for MTM. Setting up the page and getting off the ground took mere minutes despite having had no real prior experience with it. I’m not sure how it would handle sites with hundred or thousands of pages (e.g. larger blogs) but for project- or event-pages that require no to very little dynamic content, this feels ideal.
Oh, and it now even has Python 3 support so: Would use again 😊
If you’re curious, you can find the site’s source code on Github 😉

Do you want to give me feedback about this article in private? Please send it to comments@zerokspot.com.
Alternatively, this website also supports Webmentions. If you write a post on a blog that supports this technique, I should get notified about your link 🙂