
A couple of weeks ago I listened to a podcast with Abel Wang about Continuous Delivery Pipelines and Azure Pipelines in particular. At work I’m mostly using Jenkins and ConcourseCI right now while for at-home projects I favour Gitlab’s CI system. I still have quite a few projects on Github, though, and for most use-cases I would like to have a bit more flexibility than TravisCI’s free plan offers. Perhaps Microsoft’s CI solution could be a better fit here. What follows is a short recap of how I messed around with Azure Pipelines over the weekend in order to find out how it performs compared to GitlabCI?
A quick disclaimer, though: A big part of Azure Pipelines is the handing of releases/deployments. So far I didn’t have time to look into that. The projects I want to use Microsoft’s product right now are either libraries or things like small CLIs where the CD parts are not that important. That being said, I might look into those features in a later post.
Getting started
Getting started with Azure Pipelines is quite similar to Gitlab CI: You place a
azure-pipelines.yml file in your project’s root directory and tell Azure
about it. For this you first have to create a “project” which can reference,
for instance, your source-code on Github. As a test-bed I’ve used my
tpl project on Github and created a project on
Azure DevOps by the same name: https://dev.azure.com/hgutmann/tpl.
Once I had a project, I finally got to the step where I could create my first pipeline. After defining where my source code lives (in my case Github) Azure Pipelines takes a look at the repository and suggests a template to start with. What follows is a simple textarea where I could customize the output of the Go template and store the result back into the source repository.
For tpl I ended up with the following pipeline:
pool:
  vmImage: 'Ubuntu 16.04'

variables:
  GOBIN:  '$(GOPATH)/bin' # Go binaries path
  GOROOT: '/usr/local/go1.11' # Go installation path
  GOPATH: '$(system.defaultWorkingDirectory)/gopath' # Go workspace path
  GO111MODULE: off
  modulePath: '$(GOPATH)/src/github.com/$(build.repository.name)' # Path to the module's code

steps:
- script: |
    mkdir -p '$(GOBIN)'
    mkdir -p '$(GOPATH)/pkg'
    mkdir -p '$(modulePath)'
    shopt -s extglob
    mv !(gopath) '$(modulePath)'
    echo '##vso[task.prependpath]$(GOBIN)'
    echo '##vso[task.prependpath]$(GOROOT)/bin'
  displayName: 'Set up the Go workspace'

- script: |
    go test -v ./...
  workingDirectory: '$(modulePath)'
  displayName: 'Run tests'

- script: |
    cd cmd/tpl
    go build
  workingDirectory: '$(modulePath)'
  displayName: 'Build'
This configuration first defines what kind of agent I want to build tpl on; in
this case it should be a Ubuntu machine. Next comes a section where a couple of
environment variables are set. As tpl already vendors all its dependencies,
I’ve set GO111MODULE to off. The heart of each pipeline is a collection of
steps and their tasks in which, first, some general house-keeping is done.
Next I’ve added a step run the tests that are part of the project followed by a
simple go build.
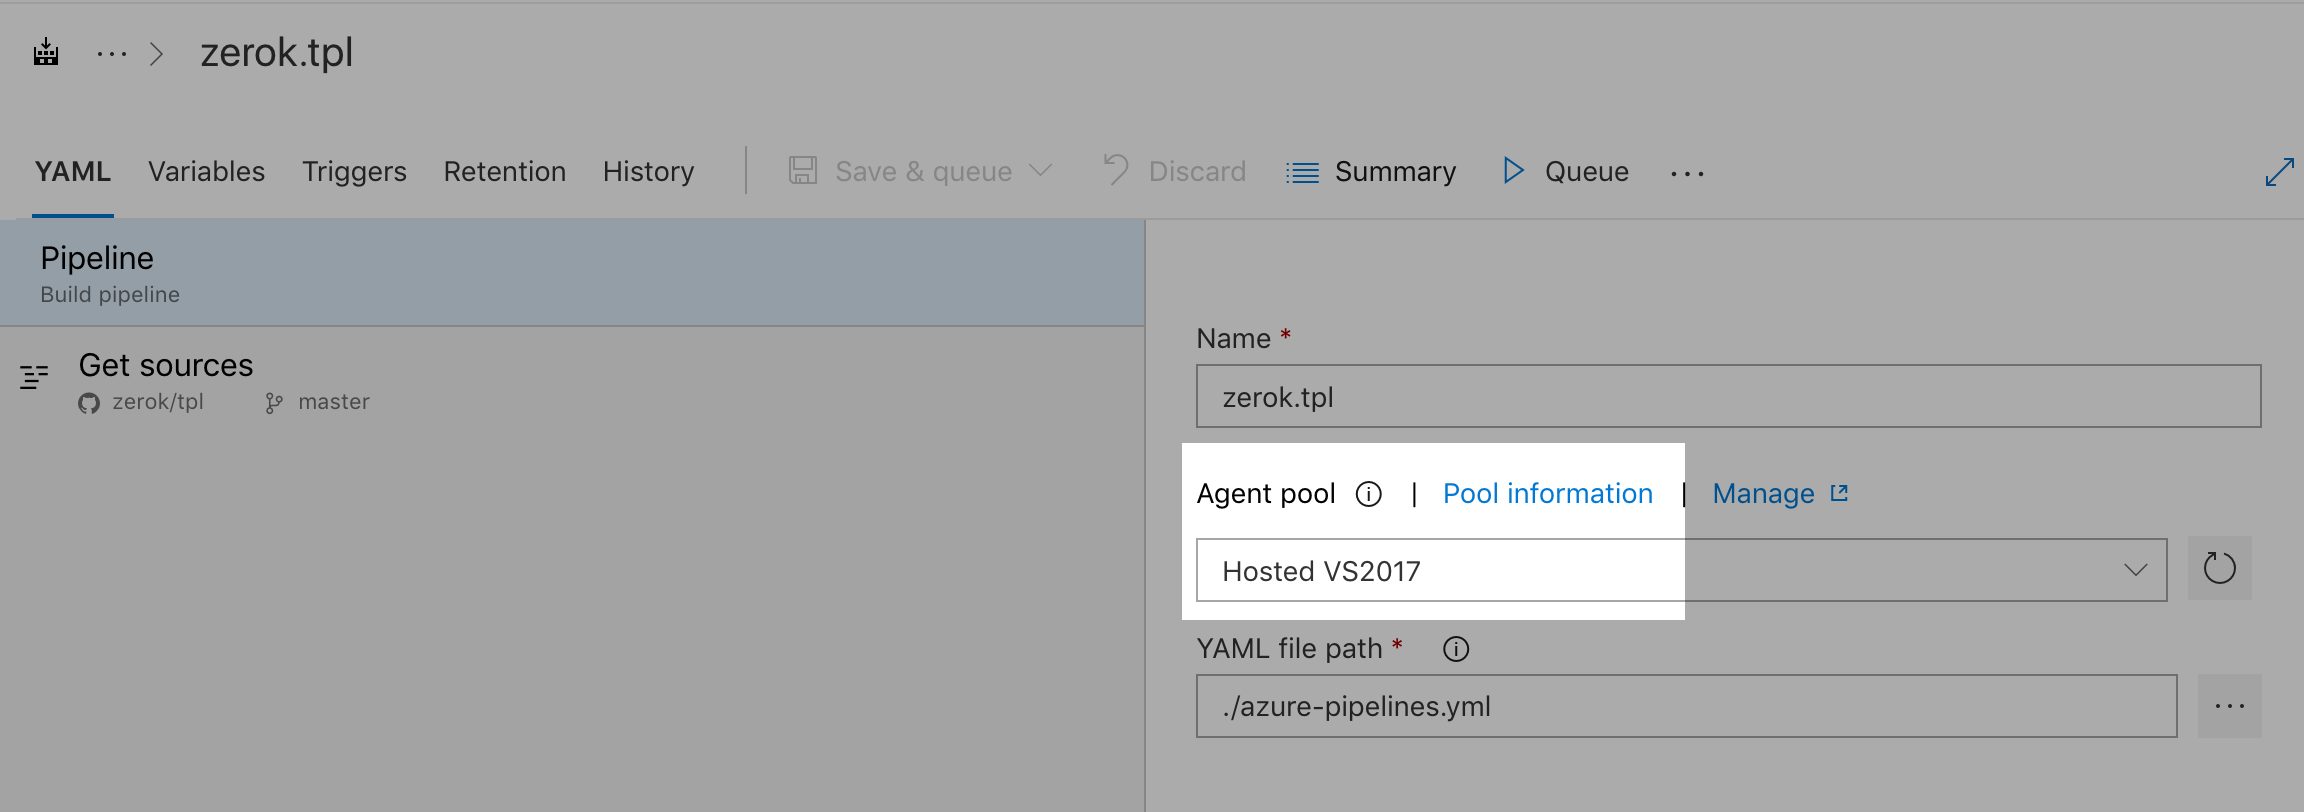
That’s also pretty much what the the default template for Go projects looks like. What isn’t clear here is where does the Go toolkit come from. We didn’t explicitly install it, so it has to be something that is provided by the agent the job is executed on. Digging deeper into the metadata of the pipeline I noticed that the pre-selected agent was a “Hosted VS2017” which has Go 1.11 installed.
In order to make things a bit more explicit here, I switchedfrom the tpl repository to a playground containing not only a Go component but also some NodeJS code:
$ exa --tree
.
├── azure-pipelines.yml
├── README.md
└── services
   ├── something-in-go
   │  └── main.go
   └── something-in-nodejs
      ├── index.js
      ├── package.json
      └── yarn.lock
Pipelines, jobs, steps
While the original example was a complete pipeline, it was a very minimal one. A pipeline can consist of multiple jobs which in turn are made up of steps. The example is basically just a single job as all you can see are steps.
Jobs allow you to define dependencies between certain execution steps and also run multiple instances in parallel in order to do things like matrix-builds. This is what we’re going to do in the azure-pipelines-playground pipeline.
Go service job
I created a job for every service in there, starting with the Go one:
  - job: go_service
    pool:
      vmImage: 'Ubuntu 16.04'
    variables:
      GOPATH: '$(system.defaultWorkingDirectory)/gopath'
      GOROOT: '/opt/hostedtoolcache/go/1.11.0'
      modulePath: '$(GOPATH)/src/github.com/$(build.repository.name)'
    steps:
      - task: GoTool@0
        inputs:
          version: 1.11
      - script: |
          echo $PWD
          find .
          mkdir -p '$(GOPATH)/pkg'
          mkdir -p '$(modulePath)'
          shopt -s extglob
          mv !(gopath) $(modulePath)
        displayName: "Setup"
      - script: |
          go build
        workingDirectory: '$(modulePath)/services/something-in-go'
        displayName: "Build"
No surprises here as it pretty much does the same as our previous example with the one difference that we explicitly install Go 1.11.
NodeJS service job
The second service is written in NodeJS and doesn’t vendor its dependencies. So, I need a job that fetches them:
  - job: nodejs_service
    pool:
      vmImage: 'Ubuntu 16.04'
    steps:
      - task: NodeTool@0
        inputs:
          versionSpec: '10.x'
      - script: |
          yarn
        displayName: "Install dependencies"
        workingDirectory: '$(system.defaultWorkingDirectory)/services/something-in-nodejs'
This basically installs NodeJS 10.x and then runs yarn inside the service’s
root folder.
Building artifacts
Let’s bring the output of these two jobs together and create an artifact that contains (1) the binary produced in our Go job and (2) the whole something-in-nodejs service directory including the downloaded dependencies:
For this I first have to publish an artifact out of every job containing all the things I want to have in the final artifact:
      - task: PublishBuildArtifacts@1
        inputs:
          pathtoPublish: '$(modulePath)/services/something-in-go/something-in-go'
          artifactName: 'something-in-go'
...
      - task: PublishBuildArtifacts@1
        inputs:
          pathtoPublish: 'services/something-in-nodejs'
          artifactName: 'something-in-nodejs'
Finally, I combine these two artifacts in a job that depends on the first two service-jobs and creates a single artifact:
  - job: publish_artifact
    dependsOn:
      - nodejs_service
      - go_service
    steps:
      - task: DownloadBuildArtifacts@0
        inputs:
          artifactName: something-in-nodejs
          downloadPath: '$(Build.ArtifactStagingDirectory)'
      - task: DownloadBuildArtifacts@0
        inputs:
          artifactName: something-in-go
          downloadPath: '$(Build.ArtifactStagingDirectory)'
      - task: PublishBuildArtifacts@1
        inputs:
          pathToPublish: '$(Build.ArtifactStagingDirectory)'
          artifactName: 'combined-build'
      - task: PublishPipelineArtifact@0
        inputs:
          targetPath: '$(Build.ArtifactStagingDirectory)'
          artifactName: 'combined-pipeline'
I’m not yet completely sure, what’s the difference between
PublishBuildArtifacts and PublishPipelineArtifact. UI-wise, the first are
usually also offered as zip files while the latter is rendered as a directory.
I assume that build artifacts are stored alongside each build while pipeline
artifacts are stored over the lifetime of the whole pipeline and not just a
single build.
Sadly, I haven’t yet found the page in the documentation going into details here. It must exist somewhere, though 😅
Caching files
When it comes to preserving state across multiple job executions, it seems like Azure Pipelines doesn’t offer something like the caches task-option in ConcourseCI or the cache option in Gitlab CI. Right now I assume that users should handle that explicitly using build artifacts.
The agents pool
One feature that made my life so much easier over the month with Gitlab CI is their support for custom runners. You can just take one of your servers, install a runner package on it and let Gitlab CI dispatch tasks to it. This way you no longer depend on shared workers.
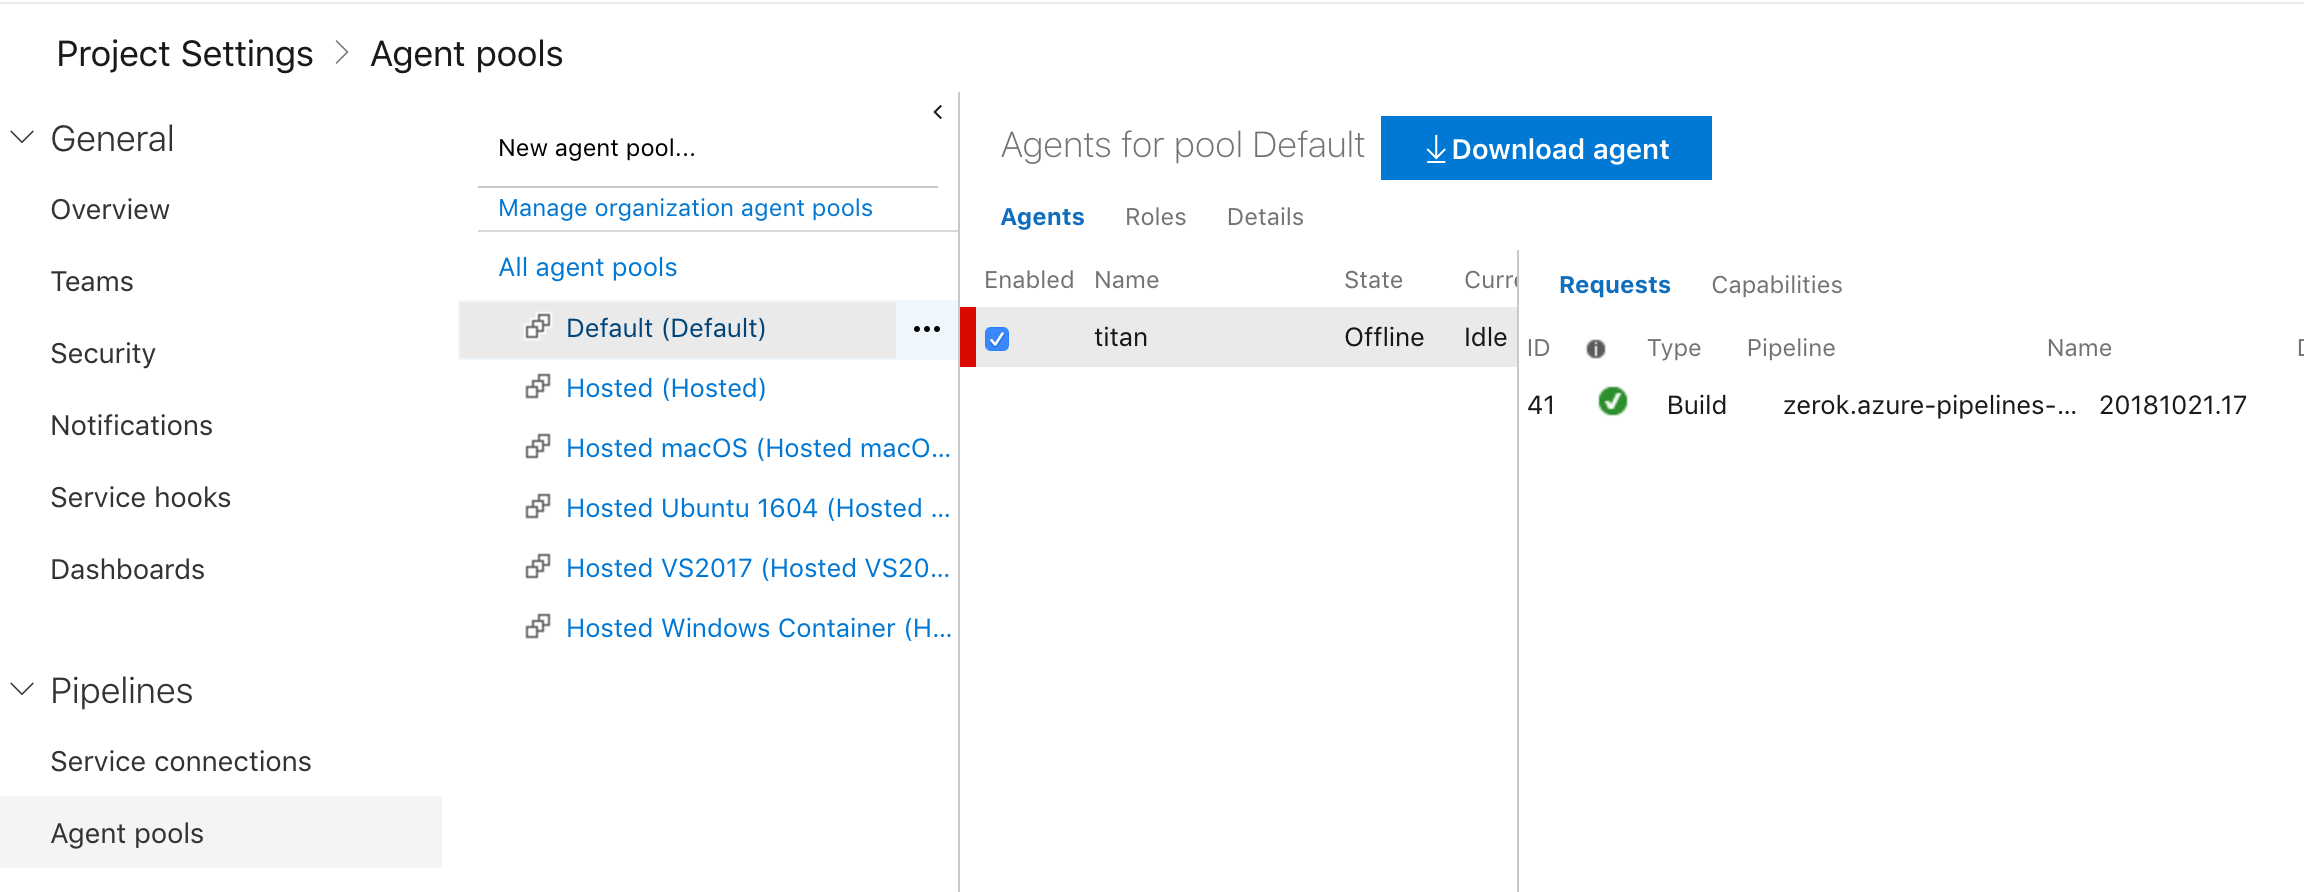
As already indicated above, Azure Pipelines has something similar: You can install an agent on Windows, macOS, or Linux. Once the installation is complete, you can create an agent-pool with your agents in it so that the pipelines can dispatch tasks to them.
Summing up
Looks like Azure Pipelines might be pretty much what I’ve been looking for. It has a feature-set comparable to Gitlab CI (and more) while not being all that more complicated. That being said, it won’t replace Gitlab CI pipelines for me, though, but for my Github-hosted open-source projects it’s definitely more appealing than TravisCI.
Do you want to give me feedback about this article in private? Please send it to comments@zerokspot.com.
Alternatively, this website also supports Webmentions. If you write a post on a blog that supports this technique, I should get notified about your link 🙂